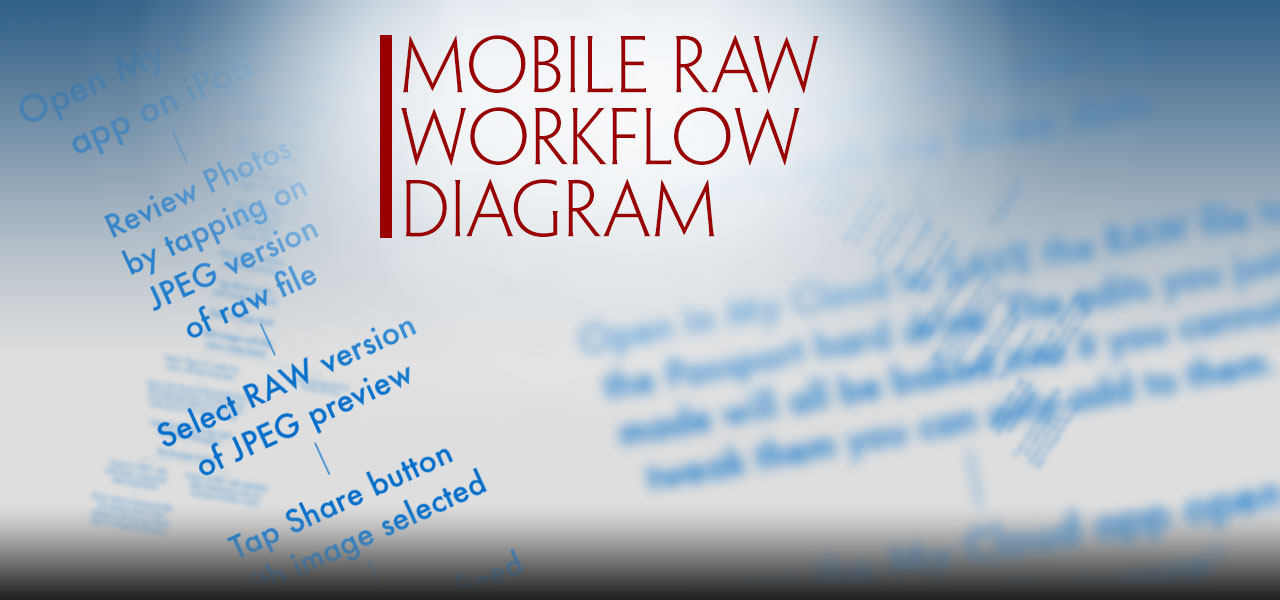
Destructive workflow for processing RAW files on an iPad
Recently, I wrote a post about The Ultimate Mobile Photography Workflow where I discuss how you can edit RAW files with your iPad by working with the files on an EXTERNAL hard drive. You should start with that post unless you already know how to connect the two and get the RAW files into an editor.
I wrote that post in response to an article that Bob Patterson, Publisher of Street Photographer Magazine wrote. His article was called Street Photo Blogging On The Road (October 2015.)
The post below covers a visual representation of the RAW + External Hard drive workflow. It also details more about the apps I use and the pro’s and con’s of each.
This diagram will show you the steps to go through to edit RAW files on your iPad. This process is titled “destructive” because it is not possible to save the edits you make on the RAW files in the apps listed below—you can not go back and re-edit them using this workflow. It is not possible to save a layered Photoshop file or something that Lightroom could read from an XMP file (not as of this writing anyway.) I have not figured out a nondestructive way of doing this as yet.
If you want to make a change, you will either need to start from scratch or work with the RAW file you exported that is already toasted with your first set of edits.
It doesn’t really matter what camera you have in this instance as long as it has an SD card that you can insert into the WD Passport Wireless hard drive. That is the only type of card it accepts, currently.

Folder Structure
I use the words directory and folder interchangeably here. Most Mac people call them “folders” and Windows folks call them “directories” but they are the same thing. You are going to want to have a folder structure to work in. Since it is possible to save files directly to the WD Passport Wireless, having this structure will help you keep track of where all your files are, what they are called, and what they are for. I use a similar structure on my desktop computer so it makes sense to do so here.
While it is possible to do this next step on your iPad, it’s faster to just connect your WD Passport Wireless to your computer. It should mount like any other hard drive. Open it through the finder and you will see several directories that relate to the files that came with the drive. One of them is called SD Card Imports. This is where your files go when the hard drive ingests the files from your SD card. It will ingest everything that is on your card including files that are meaningless.
The important folder in that group is called DCIM and it contains your photo files. Everything else, you can get rid of. All you really need are the RAW+JPEG files. You are going to move all these files to a location that makes more sense as you will see in a moment, but you could work on them here if you really wanted. It might be quicker but you will only end up confusing yourself and possibly overwriting and the original file so follow me for a few minutes.
Now, go back to the Root folder (directory) where the SD Card Imports folder is located. Create a new folder based on the name of the network or hard drive name you assigned to the hard drive. For example, I name all my hard drives something unique and I tape the name to the bottom of the drive. This way if I ever have a broken link to a file appear in a page layout program, I can trace the files’ origins to the exact hard drive/folder, etc. You only have to do this once.
So I created a folder called Projects MGC4. MGC is an acronym for Mark Gilvey Creative (my commercial photography business) and this is my fourth Passport hard drive. Before you jump into this, make another folder in the root folder. This folder is going to contain several other folders and will be a template—you only have to do this once. This way you can copy this folder into the Projects Name folder whenever you need to make a new project. You can’t put it into the Projects folder because you’ll overwrite itself, just put it outside that folder. Place a hyphen at the front of the name so it appears at the top of the list as I have done here:
![]() – YYYY MM DD Project Name <— The date sorts all your projects by date, hyphen puts it at top
– YYYY MM DD Project Name <— The date sorts all your projects by date, hyphen puts it at top
![]() Photography <— All photography-related files
Photography <— All photography-related files
![]() Captures <— RAW+JPEG files
Captures <— RAW+JPEG files![]() Output <— Scaled JPEG and PNG files for blog/website
Output <— Scaled JPEG and PNG files for blog/website![]() D-EDT Elements <— Edited RAW files
D-EDT Elements <— Edited RAW files![]() Elements <— Layered PSD’s and other elements
Elements <— Layered PSD’s and other elements
![]() Print <— Page layout docs
Print <— Page layout docs
![]() Images Raster <— Flattened JPEGs/TIFF for page layout
Images Raster <— Flattened JPEGs/TIFF for page layout![]() Images Vector <— Illustrator vector files
Images Vector <— Illustrator vector files
Ignore the “Print” folder if it’s not part of your workflow. I just wanted you to see my folder structure for print projects. When you are ready to start a new project on your iPad; Long-Tap the folder above and copy/paste it into the Projects folder. Then change the name to reflect the date and project name. Some of the folders probably won’t apply to your workflow so you can delete whatever is superfluous.
Workflow
Here is the way I see employing Snapseed and Photogene:
Snapseed is the only app that you can save the edited RAW file out of: and it is a workhorse! If you are used to the control that Lightroom offers, Snapseed will give you some of this control on your iPad. Use it to make your image look just the way you want. You won’t be able to save a file that you can adjust the edits. In fact, it appears to throw away the edits you made once you commit to them by clicking the checkbox. However, you will be able to save a second RAW file with all the edits baked into the RAW file.
You just have to remember to NOT save the file back into the Captures folder or you might overwrite the original. Save it into the D-EDIT Elements folder instead. Add “-D-EDIT” before the extension. For example, if your file was called DSC####.ARW (a Sony RAW file,) update the file name to DSC####-D-EDIT.ARW. D-EDIT is a new acronym I am introducing into my workflow. The acronym stands for Destructive Edit. This will tell me this file was edited on a mobile device. It will also differentiate it from the original file name so there is no chance of overwriting in the event they end up in the same folder.
Normally, I have an Elements folder where layered PSD files go or I leave them within the Captures folder within my Lightroom workflow (more-less.) For mobile editing, it makes more sense to place the edited RAW files in their own folder away from the originals. You can do this through the My Cloud app. Long-Tap the file so the options appear at the top of the screen, then select Rename.
What this also means is you will need to move all your RAW+JPEG files that were ingested into the SD Card Imports folder into the new Project/Captures folder you created.
I use Photogene for prepping for the web (if you don’t have time to transfer the edited RAW file to your laptop or save it for later exporting after edits have been made—this is the way to go. Photogene will not save an edited RAW file!
While it is true, you can Save and Save As, a JPEG from Snapseed, you can’t save it at a specific size, resolution, quality setting or format. You also can’t add a watermark or metadata to the file, like you can in Photogene. Use Photogene to open the D-EDIT RAW file and then export it to the file size you need. Create a metadata template so you don’t have to add it all the time. Then export the file where you need it to before going to the next step in your workflow, whatever that may be.
About Metadata
Since I also operate a commercial photography business, I have been more conscious of the photos I put on the web. I have been filling in some of the IPTC data (Name, (not address) city, state, phone (I use a Google Voice number for this, not my personal), copyright, PLUS+, at minimum) that lives within my files so if someone needed info on the file and the creator it will (hopefully) travel with the file. Some websites strip this info so there is nothing you can do about it short of adding a Digimarc which nothing can strip. I have not added Digimarc to this workflow as yet because there is not a mobile version of it. My other option is to add PLUS+ registry info which could also get stripped.
Why add metadata? Our computers now search this metadata right from the finder/explorer. If someone (who was honest) had your file on their computer and were to search their computer for a keyword that is in your metadata, your file should come up. It’s a difficult and time consuming step to integrate, even on the desktop. Luckily you can save templates in the Photogene app which will help you add this without having to leave the app or key all of it in manually. I just want you to be aware of it. It will help differentiate you as well.
It’s important to note; this metadata information, currently, does not get searched by the search engines, only the file name does. I doubt the search engines will ever spider that info or maybe they will and just won’t use it as an SEO factor. It’s too easy to fill with spam.
Another important note; The copyright info, some people might say that the image has a copyright when you take the photo but the fact is, that means exactly squat unless you register it with the US Copyright office. No lawyer will talk to you without this registration. That said, not having it doesn’t help you either. If you add your copyright and some additional metadata, someone might be more inclined to contact you about using your photo which you probably don’t have a model or property release for—yay! Or better yet, they might want to hire you for a shoot where you would be more likely to get signed releases and that’s not a bad thing at all. You might say your street photography becomes more of a networking tool to that end.
Like I always say; PHOTOGRAPHY IS NOT A CRIME. Welcome to the new world. There you go, I’ve opened a rabbit hole here but I’m not going down it any further.
App Pro’s and Con’s
This section detail notes I’ve made between the various post-processing apps that I can use on the iPad to edit RAW files.
Apple Photos
Will only work with files that are located on your iPad hard drive which is what we want to avoid.
Adobe Photoshop Express
Doesn’t appear to be able to import RAW files currently, strangely, what the?
Adobe Lightroom Mobile
Doesn’t appear to be able to import RAW files currently, huh? Quelle surprise!
Google NIK Snapseed
Hands down the best of all the RAW processors I’ve worked with on the iPad!
It opens RAW files:
- that have been Shared from MyCloud app (this is the only way to get files that are on the Passport into Snapseed)
- that are on iPad via the “Open from Device” prompt which only goes to Photos Library
It will save the RAW files:
- to Photos Library by way of the Save and Save a copy options, but remember, that takes up more space on your iPad hard drive
- to WD Passport Wireless by clicking the 3 vertical dots menu that is next to the Save menu. Select Open In (not Share) and then select My Cloud and it will prompt you to save the edited RAW file to the Passport. Save it into the D-EDIT Elements folder as mentioned above.
NIK PRO’S
- The RAW file can be saved to your iPad or, better; your Passport hard drive
- The RAW file has all the edits you made in Snapseed (yes, it really does)
NIK CON’S
- Can only open files that have been saved into Photos Library unless you Share it from the My Cloud app to Snapseed
- You do not have the option to change the file name so if you accidentally saved it to the same location as the original RAW file, it may save over the original file.
Mobile-Pond Photogene
If you need to work quickly and don’t want to fuss around with control points, Photogene is a good solution. It does offer some nice features like a white balance picker, full access to metadata, it will save any size image you want that’s smaller than the original, TIFF, and JPEG formats.
It opens RAW files:
- that have been Shared from the My Cloud app
- that are on iPad via the tiled contact sheet that accesses the Photos Library (via the Ed..ew button)
- will NOT save the RAW file
- under the Export menu, it will let you export a JPEG or a TIF
- you can also select the size of the image to export as long as it is smaller than its’ current size.
- You also have control of the resolution DPI
EXPORTING
- Exporting is done in three parts (actually 5 parts but I only ever use 3 of them.
- Select the Resize menu and select the file size and format
- Turn on “Preserve IPTC”
- Select where to save it to
- When saving as a TIF, it uses LZW compression
- If you select Dropbox, you must give the file a name (this is the only way to change the name I’ve found so far within the app)
- If you select Save to Library, you don’t have any choice in file name and of course, it saves the file to your iPad which we want to avoid
- If you select “Other Apps/My Cloud” it will let you save the new file to the Passport but won’t give you the option of renaming it
- There are other destinations to share/save the file to
Photogene PRO’S
- You can save TIFF files (I’ll have to see what profiles they use). Since you can’t save a RAW file, this is more desirable than a JPEG format
- You can embed watermarks and metadata
- You can rescale a photo
Photogene CON’S
- If you click the “Ed..ew” button while you are working on a file, the file disappears and you have to reopen it and apply all your edits again. DON’T PRESS THAT BUTTON FOR ANYTHING.
- If you click the DONE button, the file goes away and so does all your work
What about those D-Edit RAW files?
As mentioned earlier, you need to have one location for the original RAW files (Captures folder) and another for the edited versions of those RAW files (D-EDIT Elements folder.) Once you edit your RAW file, you put it into the D-EDIT Elements folder. If you crop the file, it WILL be cropped and IT WILL have all the edits you made to it. This reminds me of the days of Photoshop 2.0 when we had to save multiple versions of a file to capture various stages of the editing process because there weren’t any Layers to work with. I tell you this because many people think that you can’t edit a RAW file and have those changes hard-baked into the file—they can.
CONCLUSION
Well there you have it; that’s how to edit RAW files on an iPad or mobile device from an external hard drive. Those are the hoops you have to jump through. I’m really happy that it is possible to do this. I’m annoyed that I can’t save a layered PSD in 16 bit ProPhoto so I can edit it later as a file that is “near” RAW quality. At least I have a RAW file that has the corrections to it, even if I can’t back off on anything I did previously.
I think it boils down to what your methodology is. One of my friends, a street photographer; Carsten Schmidt likes to keep the workflow so simple, he went as far as purchasing a Leica-M so he didn’t have to take the time to convert it from color to greyscale. It makes perfect sense if you want to get your work exposed to the world as fast as possible.
In my view, I would rather have control over as much as I can but if I am going to photograph and publish as quickly as possible, the method I have outlined here is a good start for now. I can always edit the original RAW files on the desktop later for the art of it.
![]()

Street Photography Podcast Interview
In early November 2021, I had the honor of being interviewed by Bob Patterson, editor of Street Photography Magazine.

Straight Out Of Camera?
Pt. 3 How my photograph won the 2021 Fredericksburg Street Photography Collective Shoot-Off

Pt. 2 How my photograph won the 2021 Fredericksburg Street Photography Collective Shoot-Off

Pt. 1 How my photograph won the 2021 Fredericksburg Street Photography Collective Shoot-Off
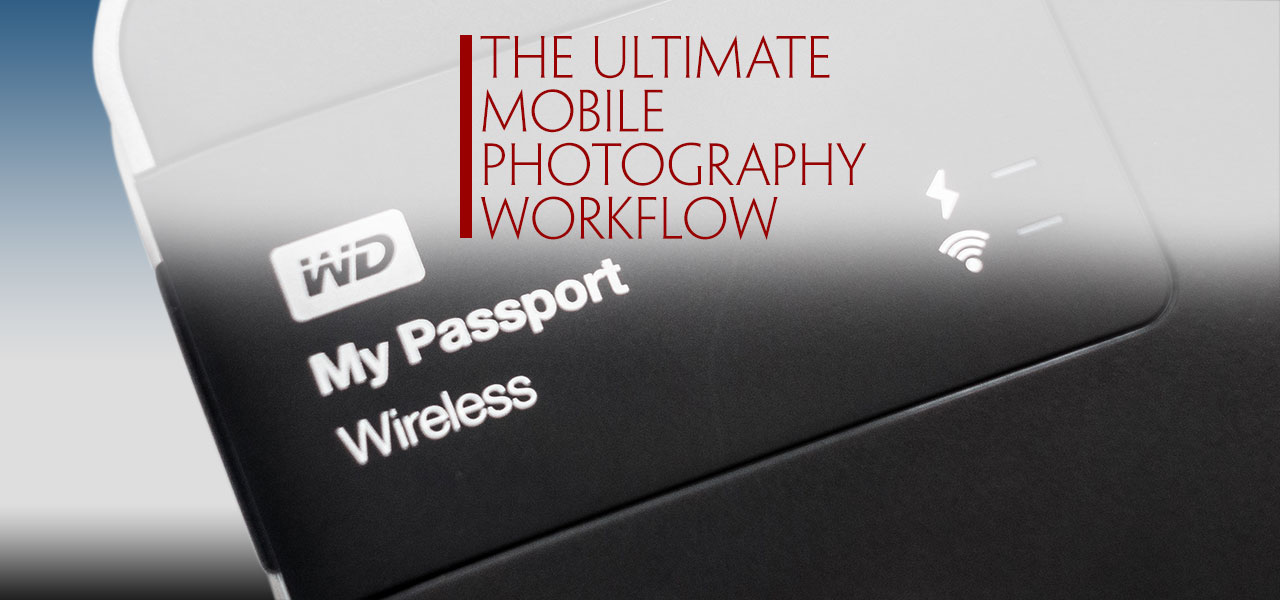
The Ultimate Mobile Photography Workflow
Are you trying to figure out how to connect an external hard drive to your iPad? Do you need more dive space to save your photos? In this post, Mark Gilvey (Mark Gilvey Fine Art Photography) shows you how to bring a RAW file workflow to your iPad.
Mark,
Wow, what a thorough review. I never gave RAW editing on the iPad much thought until I read this and your previous review of the WP Passport Wireless (which is now on my Christmas list).
This will be a valuable resource for anyone serious about editing on iOS.
However like everything else in the mobile world, things change fast. Hopefully someone will fill some of the gaps you pointed out here.
Bob
Open .arw in snapseed : check
Edit photo : check
Open in My Cloud to,save the edited raw file there in another folder : not working 🙁
First of all, cant choose folder : he puts the file in Downloads
And, more importantly, RAW is only 630 Kb large?! Strange…
Snapseed doesnt resize (checked the settings).
Any idea?
Thanks for posting your workflow!
Ouch! So sorry to just see your question just now (8 months after you posted it). Did you figure out a better way or resolve it?